
Set the Normal Style in Excel
Set the normal style in your Excel workbook to your most commonly used settings, to keep formatting consistent across all the cells of new worksheets.
Changing the Normal Style for Existing Workbooks
To review and adjust the normal style in an Excel workbook:
- First, expand your Excel window as wide as possible. On small screens, you may need to manually expand the width of the window, rather than maximizing the window. This gives room for the Styles section to expand. In the Styles section, if the style Normal is not visible, first see Remove Extra Styles in Excel.
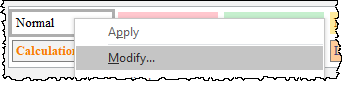
- Right click on Normal, then select Modify.
- Review the settings; to make adjustments, click Format.
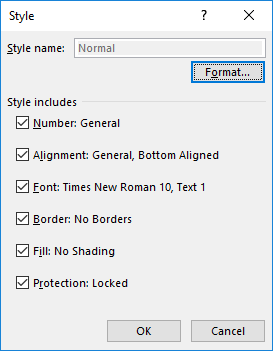
- Make adjustments to each tab:
- On the Number tab, select General.
- On the Alignment tab, set Horizontal to General , set Vertical to Bottom, and make sure Wrap Text or other options are not selected.
- On the Font tab, select your default font style and size, such as Times New Roman, 10 pt.
- On the Borders tab, select None.
- On the Fill tab, select No Color.
- Click OK.
- Verify your selections, then click OK again.
- After making this change, you'll want to review the column widths on each page, to make sure they're consistent with each other and fit appropriately inside the margins of the Word page. Notice that the column widths throughout the file may change, due to the difference in widths of characters in different fonts. (When you right click on a column and choose Column Width, it's actually showing you the number of characters in the font and size that are selected, rather than an absolute measurement).
Setting the Normal Style for New Workbooks
To control the default font style and size for any new workbooks:
- On the File ribbon, click Options.
- On the General tab, under When creating new workbooks, adjust the selections for Use this as the default font and Font size.
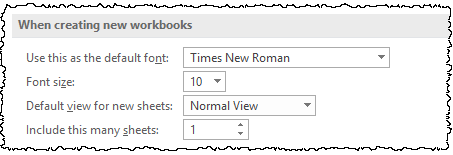
- Click OK.
We recommend setting the normal style in your Excel file to the most commonly used font and size, and to a General cell format. To see the normal style, first expand the Excel window as wide as possible. On the Home ribbon, now the styles in the report are visible. Click to expand the styles if needed, and right click on Normal. Then select Modify. Notice here the default format is set to a date format, instead of General, and the font is set to Calibri 11. We'd like to change both of those. Click Format. Under Number, change to General. Under Font, change to Times New Roman 10. You may like to review the other tabs as well. For example, horizontal alignment is General, vertical alignment is Bottom, no borders, no fill. Click OK. Click OK again. Notice that this may change your column widths throughout the file, since different fonts have different widths of characters. When you right click on a column and choose Column Width, it's actually showing you the number of characters in the font and size that are selected. After making this change, you'll want to review the column widths on each page, to make sure they're consistent with each other and fit inside the margins of the Word page. In Excel, you can also set the font and size for a new document. Click File, then Options. On the General tab, under When creating new workbooks, fill in the box for Use this as the default font and Font size. Click OK.
Copyright © 2021 Certent