
Remove Extra Styles in Excel
In your Excel file, you may want to review, and possibly eliminate, extra styles. Excel automatically creates styles behind the scenes. Too many styles may lead to an increased file size, or an error message:
Too many different cell formats. Excel encountered an error and had to remove some formatting to avoid corrupting the workbook.
Identifying Extra Styles
First, expand your Excel window as wide as possible. On small screens, you may need to manually expand the width of the window, rather than maximizing the window. This gives room for the Styles section to expand. In the Styles section, look for a large number of styles or many duplicates of similar styles.

Using XLStylesTool
To remove the extra styles:
- Use this link to open XLStylesTool in the Microsoft store.
- Click Get and install it on your computer, reaching out to your IT team if assistance is needed.
- Run the program from your Start menu.
- Click Get File.
- Select the file that you want to process, then click Scan Selected File. Please first test this process using a copy of your Excel file, rather than the live version.
- The Scan Status window shows the number of styles currently in the file.
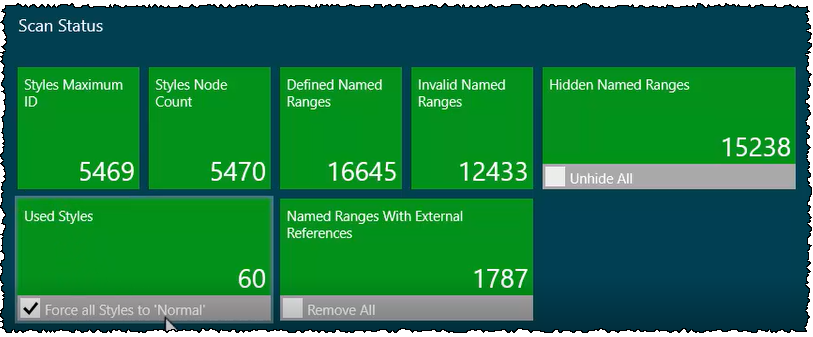
- Adjust the settings:
- In Hidden Named Ranges: unselect Unhide All
- In Named Ranges with External References, unselect Remove All
- In Used Styles, select Force all Styles to 'Normal'
- Click Process File.
- Notice on the Scan Status screen the number of styles is reduced to one.
- Close the XLStylesTool and re-open your Excel file. The styles section now displays only the default styles. You may optionally like to adjust the normal style, so that all sheets will have the desired font, size, and cell format.

In your Excel file, you may want to review, and possibly eliminate, extra styles. First, expand your Excel window as wide as possible; this gives room for the Styles section to expand. Now looking at it, I can see there are many duplicates of the same styles. Excel is doing this automatically behind the scenes, but too many of these copies may lead to a larger file size than needed, or even an error that there are too many styles in the document. To remove these, we use XLStylesTool. Follow the link to open up the XLStylesTool in the Microsoft store. Click Get. Once it's installed on your computer, open it from the Start menu. Click Get File. Select the file that you'd like to process. Make sure you run this first in a copy of your live Excel document. Click Scan Selected File. Notice it gives us several results here. Notice I have about 5,400 styles in the document. We don't want change the hidden named ranges, so I'm going uncheck Unhide All. Notice I did not check Remove All for Named Ranges with External References. In Used Styles, I do want to click Force all Styles to 'Normal'. Now click Process File. This has reduced my number of styles down to one. Close the styles tool. Reopen the Excel file. Notice now the Styles section only contains the default styles. The next step you may want to take is to adjust the Normal style.
Copyright © 2021 Certent