
Footnotes
Many fields require additional information in the form of a footnote, also known as an Explanation of Response.
You can apply footnotes when entering the information initially.
To apply footnotes after entering and saving the transaction, use the Edit button. See Manage Footnotes to create or edit a footnote.
Apply Footnotes
To apply a footnote to a form:
- To apply a footnote while entering the initial transaction, put the cursor in the field that requires a footnote and select the Footnote button located above the table.
- If you have already saved the transaction, highlight the row requiring the footnote, select Edit, then select the field that requires a footnote, and click Footnote
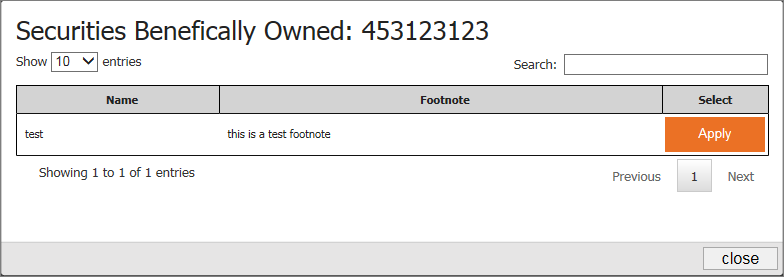
- The Footnote window displays with the list of previously entered footnotes. The title at the top of the footnote window is the name of the footnote that is already selected. Choose a footnote for the field and click Apply. You can apply as many footnotes as needed for each field
- Click Close at the bottom of the window to save the footnote to the field
- Repeat these steps for any remaining fields that require footnotes
If there is no applicable footnote in the list, save the transaction and create a new footnote under the Manage tab. Then select the Create tab to return to your transaction table and attach the new footnote.
Review and Remove Footnotes Applied to a Form
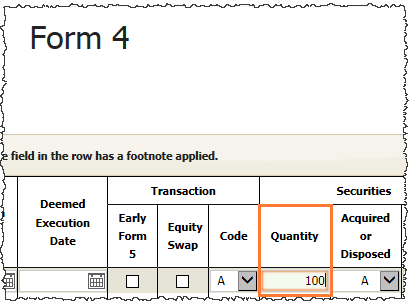
When you are finished adding footnotes and have saved the transaction record, the Footnote symbol  appears next to the row containing the footnote.
To see all fields with footnotes:
- Select the row for the transaction you want to view
- Click Edit and all fields with a footnote attached are highlighted with an orange box
- Click a field that has a footnote attached and click the Footnote button to view the associated footnote(s) in the Footnote window. The footnotes that are currently in use for this form have a box around them
- To remove a footnote:
- Click the Remove button
- Click Close
Copyright © 2021 Certent