
Roll-Forward
Rolling forward is the process of copying a project or report to be used as a template for new filings. Roll-forward saves time by retaining XBRLExtensible Business Reporting Language (XBRL) is an XML-based standard for defining and exchanging business and financial performance information. tagging, approvals and CrossLinks. For example, rolling forward Form 10-Q from Q2 to Q3.
For 8-Ks which include inline XBRL, see Roll Forward Inline XBRL on 8-K.
Selecting the Period to Roll-Forward
Best practice is to roll your previous 10K into the new 10K and to roll the 10Q from the most recently filed 10Q:
| Previous 10K --> New 10K | Q1 --> Q2 --> Q3 --> Q1 |
This method balances picking up changes throughout the year and structure changes. When rolling forward the 10K, pay special attention to content changes that happened throughout the quarters. For the 10Q, note the quarter-to-date content added in Q1 --> Q2 and deleted in Q3 --> Q1.
Roll-Forward Projects and Reports
- Copy Project
- Rename Report for the new period, if needed
Preserve Original Reports (Optional)
- Set the original reports to Read-Only
- In the DMCThe Disclosure Management Console (DMC) is the browser-based part of the DM platform used to create and manage projects and reports., set the original project to Completed
Roll-Forward Excel Linking Document
- Copy or use Save As to create a new Excel linking document. Name the document with the upcoming period and save in the appropriate period folder on your local network. Leave the old version of the Excel linking document in place with the old name, and in the old folder, for your records
- Alternative method (less common): If the Excel linking document is set up with a general name and location, the active file can be left in place. Each period, before rolling forward, save a copy of the linking document, for your records, named with the period. This takes the place of the Change Source step, detailed below
- Update Dates: In Excel, update the inputs on the Dates to Link tab, and calculate, if needed. Save
- Adjust columns: In Excel, review the structure of tables that include quarter-to-date and year-to-date content. Collapse or expand columns, adjust the width of column A, and review for wrapped labels
- Update values: Delete, zero, or enter new values for the new period. Avoid deleting or overwriting formulas. To quickly see which cells have formulas, use Ctrl + ~ to toggle show formulas on and off
Change Source and Update Links
- Open and check out the new report
- Use Change Source to point to the new location of the Excel linking document
- Update CrossLinks: On the Certent DM ribbon, click CrossLinks > Update Checked Out Report Sections > Both
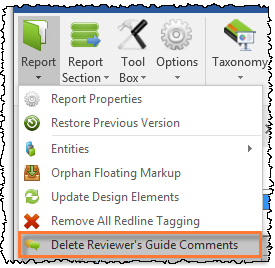
- If you prefer to remove old comments, on the DM ribbon, click Report, then Delete Reviewer's Guide Comments. Approvals are not affected.
- Update Content: Continue to draft content in the new DM Word report and Excel linking document
Note: If the dates and periods are not set up with links and you choose to use Microsoft Word Find/ Replace, Certent recommends rolling-forward the most recent year or period first. - Update hyperlinks to attached exhibits: Right click and select Edit Hyperlink, then update the Address to reflect the new period end date. See Exhibit Hyperlinks for detailed steps.
The XBRL roll-forward is completed by your XBRL Accountant as part of Premium or Platinum service. The updates most often take place after your content has been updated to a shell or pro-forma draft for the period.
Many of the steps of the roll-forward process must be completed by a Reporting Manager, such as copy project and changing a project to Completed. Only the Company Administrator can set a project to Read-Only.
Copyright © 2021 Certent